1. Add the RulesFragment to the navigation graph.
Go to the navigation editor and click the "add" button. Add the rules fragment.
2. Create the navDrawer menu with the rulesFragment and aboutFragment menu items
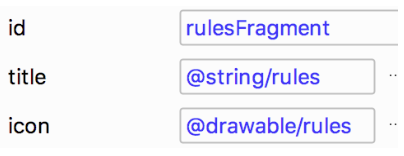
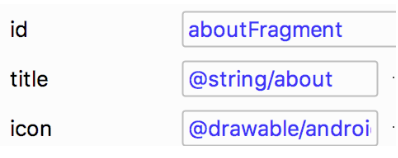
Then, we have to create the navdrawer_menu. Add two menu items by dragging menu items into the component tree.
The first item should have the id of the RulesFragment, the rules string and drawable
The second item should have the ID of the AboutFragment, the about string and the android drawable.
3. Add the DrawerLayout into the activity_main layout containing the LinearLayout and navHostFragment
It should be just inside of the Data Binding layout tag.
<layout xmlns:android="http://schemas.android.com/apk/res/android"
   xmlns:app="http://schemas.android.com/apk/res-auto">

   <androidx.drawerlayout.widget.DrawerLayout
       android:id="@+id/drawerLayout"
       android:layout_width="match_parent"
       android:layout_height="match_parent"
   >
4. Add the NavigationView at the bottom of the the DrawerLayout
Now add the NavigationView at the bottom of the DrawerLayout.
<com.google.android.material.navigation.NavigationView
   android:id="@+id/navView"
   android:layout_width="wrap_content"
   android:layout_height="match_parent"
   android:layout_gravity="start"
   app:menu="@menu/navdrawer_menu" />
5. Move to MainActivity and add private lateinit vars for drawerLayout and appBarConfiguration.
private lateinit var drawerLayout: DrawerLayout
private lateinit var appBarConfiguration: AppBarConfiguration
6. Initialize the drawerLayout from the binding variable.
drawerLayout = binding.drawerLayout
7. Add the DrawerLayout as the third parameter to setupActionBarWithNavController
Add the drawerLayout as the third parameter to the setupActionBarWithNavController method. NOTE: If Android Studio displays an error, you may have to rebuild your project before using the binding variable.
drawerLayout = binding.drawerLayout
val navController = this.findNavController(R.id.myNavHostFragment)
NavigationUI.setupActionBarWithNavController(this, navController, drawerLayout)
8. Create an appBarConfiguration with the navController.graph and drawerLayout
appBarConfiguration = AppBarConfiguration(navController.graph, drawerLayout)
9. Hook up the navigation UI up to the navigation view.
And then hook the navigation UI up to the navigation view by calling setupWithNavController.
NavigationUI.setupWithNavController(binding.navView, navController)
10. In onSupportNavigateUp, replace navController.navigateUp with NavigationUI.navigateUp with drawerLayout as parameter
And, in our onSupportNavigateUp activity method, we need to use NavigationUI.navigateUp with the drawerLayout as a parameter instead of navController.navigateUp.
override fun onSupportNavigateUp(): Boolean {
   val navController = this.findNavController(R.id.myNavHostFragment)
   return NavigationUI.navigateUp(drawerLayout, navController)
}
And that’s it. We have a working app drawer. Let's add the navigation header to finish things.
11. In the NavigationView at the bottom of the DrawerLayout within the main activity layout file, add the nav header as the headerLayout.
<com.google.android.material.navigation.NavigationView
   android:id="@+id/navView"
   android:layout_width="wrap_content"
   android:layout_height="match_parent"
   android:layout_gravity="start"
   app:headerLayout="@layout/nav_header"
   app:menu="@menu/navdrawer_menu" />
If you want to start at this step, you can download this exercise code from: Step.09-Exercise-Adding-the-Navigation-Drawer.